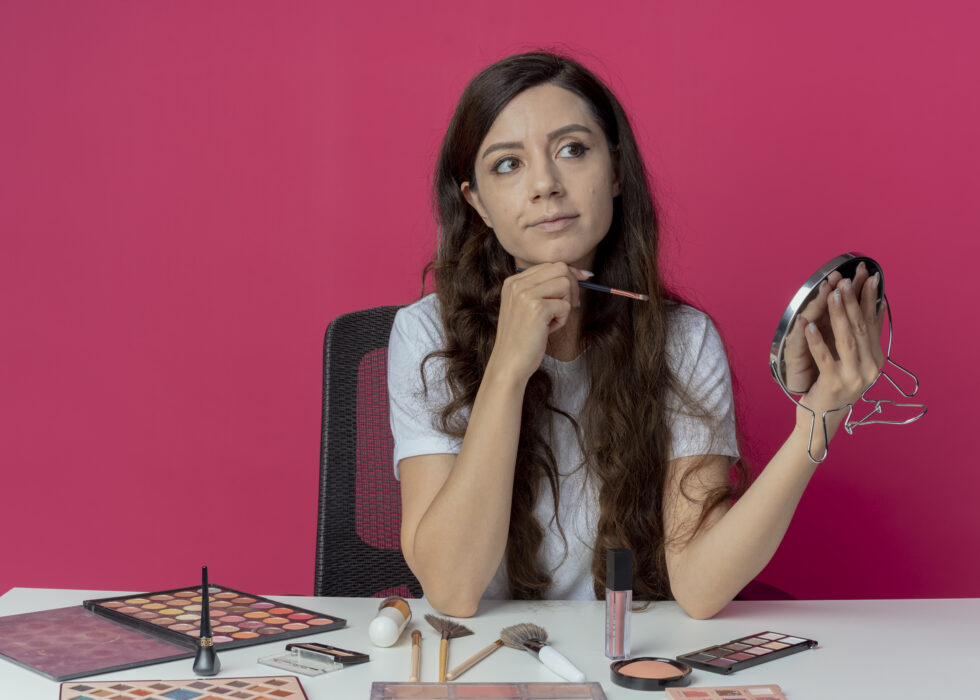

Making perfect eyebrows doesn’t have to be your daily struggle anymore. Eyebrow micropigmentation has transformed how people achieve naturally beautiful brows with a semi-permanent solution. This advanced cosmetic method uses special pigments and recision tools to build the appearance of fuller eyebrows that enhance your features authentically.
If you’re frustrated with over-plucked brows, dealing with hair loss, or tired of your morning makeup routine, micropigmentation eyebrows offer beautiful results lasting up to three years. The nano brows technique has gained attention for creating incredibly realistic hair strokes, while permanent eyebrow makeup continues developing with innovative approaches that care for both appearance and skin health.
But how does it actually work?
Understanding the Art of Eyebrow Micropigmentation
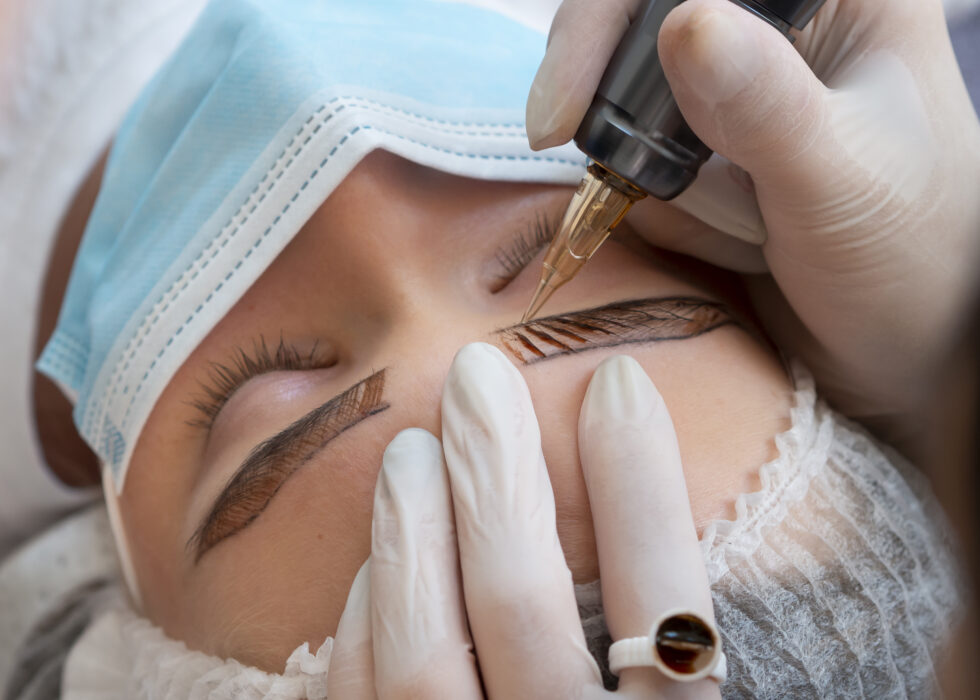
Eyebrow micropigmentation is cosmetic tattooing, but different from traditional tattoos. It deposits special pigments into your skin’s upper layers using ultra-fine needles on a digital machine. Unlike regular tattoo ink, these pigments fade gradually, lasting one to three years.
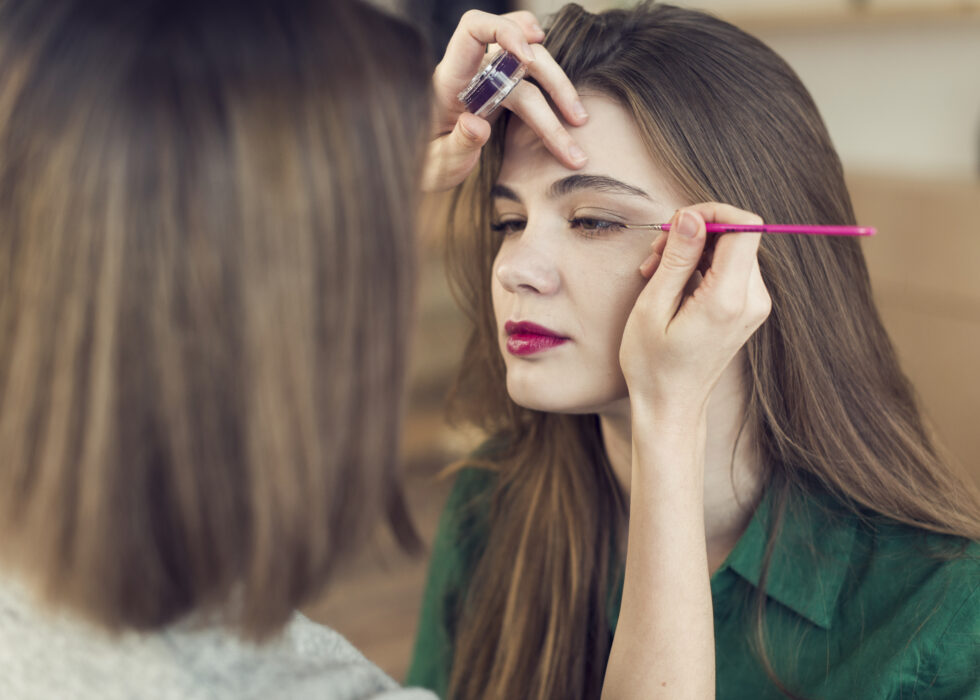
What makes it unique is how it mimics actual eyebrow hairs. Skilled technicians create small, exact strokes that blend with your current brows, filling sparse areas and reshaping to suit your features. It looks totally natural.
Within micropigmentation, one specific technique has revolutionized how natural brows can look.
The Nano Brows Technique: Precision at Its Finest
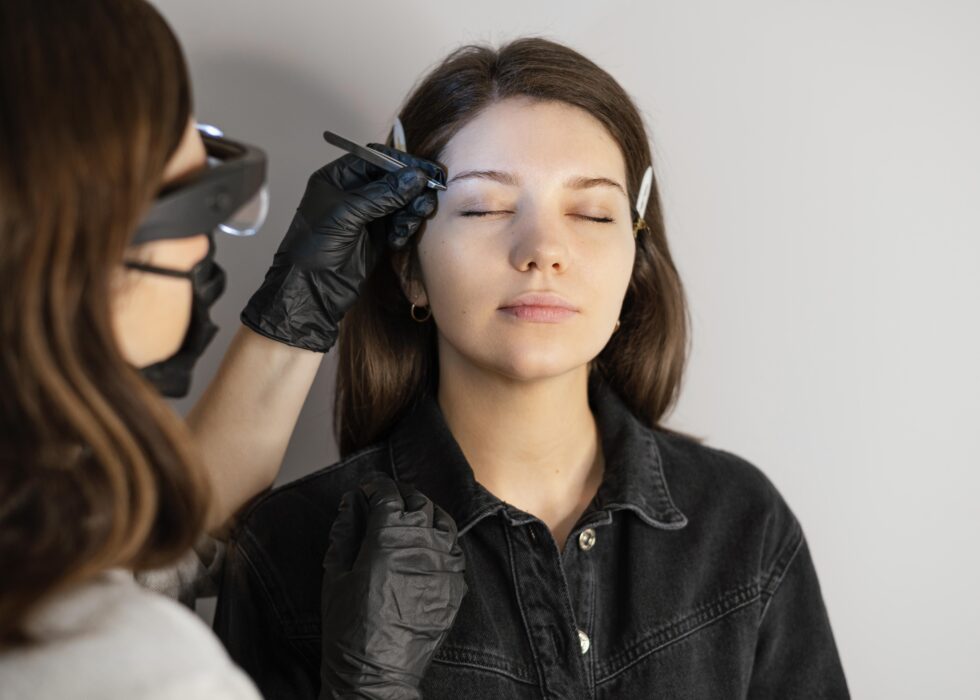
Among the various methods available, the nano brows technique has emerged as the gold standard for achieving hyper-realistic results. This advanced approach uses a digital machine equipped with a single, ultra-fine needle that’s thinner than a human hair. The needle moves at high speeds, gently tapping pigment into the skin instead of cutting it.
This technique offers many benefits compared to older methods. The accuracy allows artists to make individual hair strokes with tapered ends that look just like real brows. It’s especially good for people with oily skin, where other techniques might blur or spread as time passes. Plus, since it causes less skin damage, healing happens faster and feels more comfortable.
Here’s what the actual process looks like from beginning to end.
What to Expect During Your Micropigmentation Journey
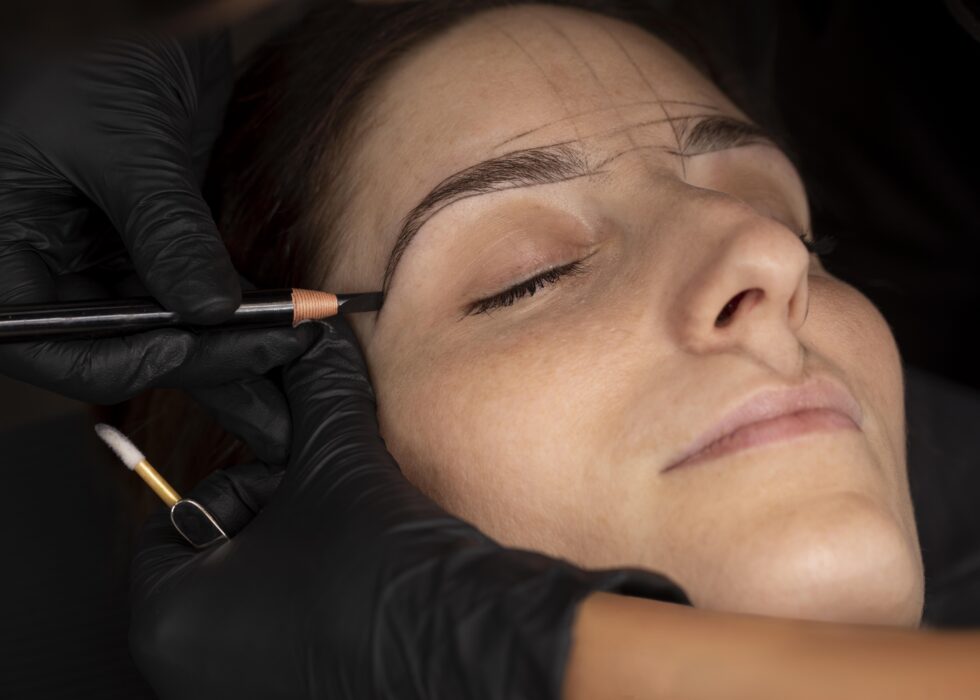
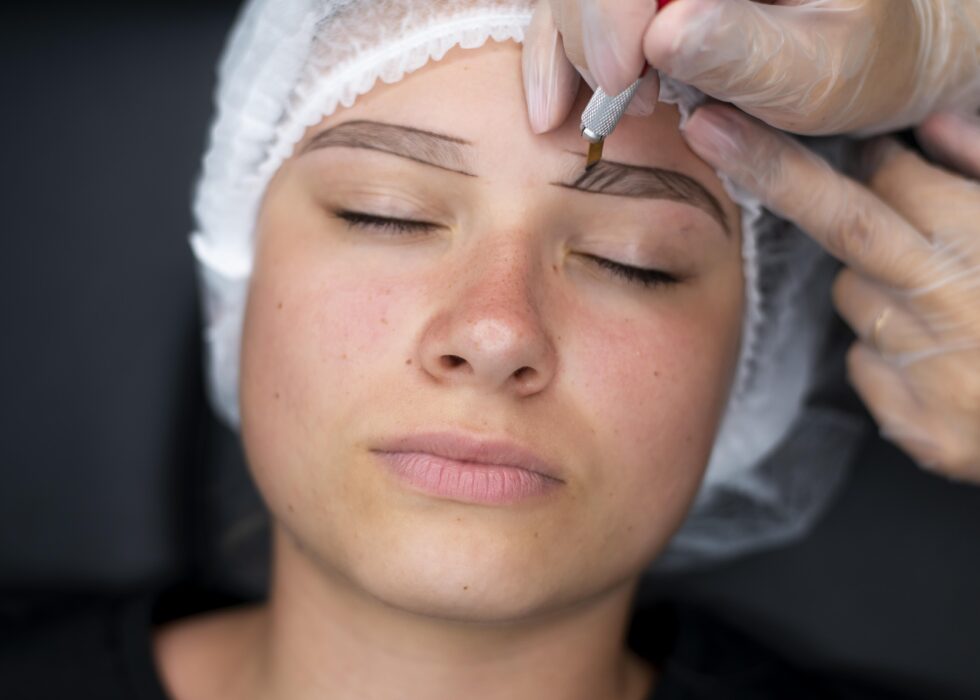
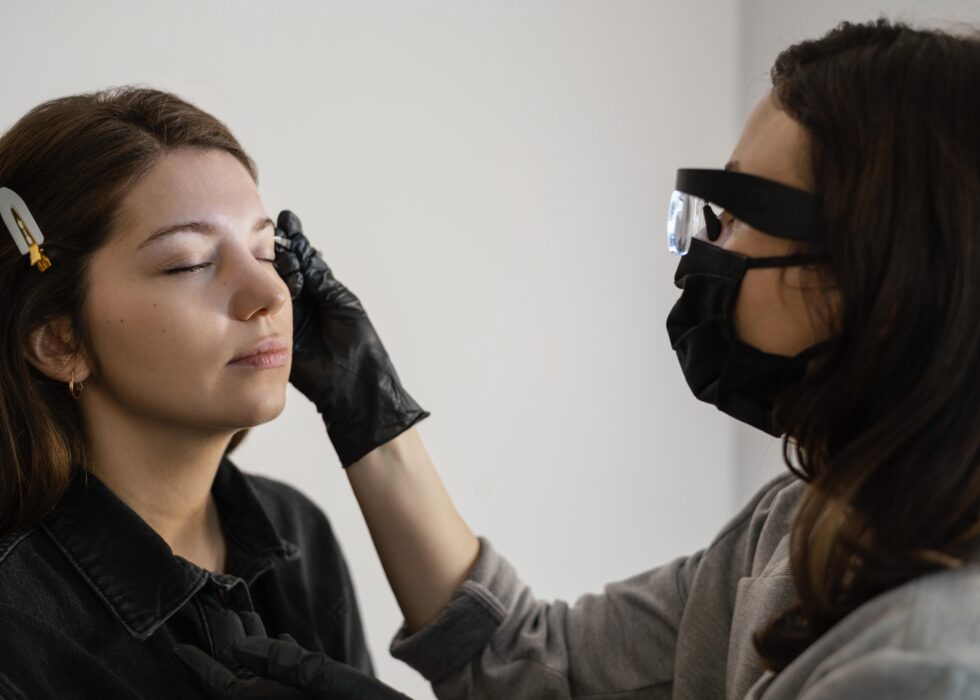
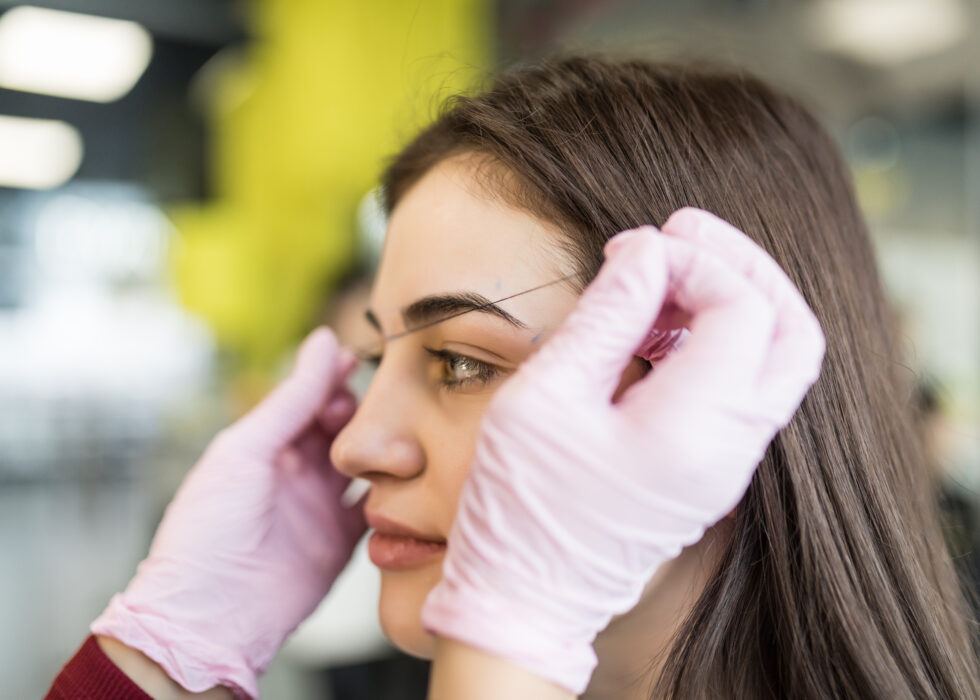
Getting permanent eyebrow makeup takes multiple appointments. At O’some Brows, your first visit is a consultation. Our technician examines your face shape, natural brow color, and skin tone. Together, you design the perfect brow shape using mapping techniques for symmetry and balance.
Before starting, numbing cream is applied to reduce discomfort. Most clients say it feels like eyebrow plucking, not painful. The session takes two to three hours while the technician carefully places pigment using small, precise strokes.
Right after, your brows look darker and bolder than the final result. This is normal. Over the next few weeks, the color fades by about 30 to 50 percent as your skin heals. A follow-up after four to six weeks lets the technician perfect the shape, fill gaps, and adjust color if needed.
What you do after your appointment matters just as much as the procedure itself.
Healing and Aftercare
Proper aftercare is essential for beautiful, lasting micropigmentation eyebrows. During the first week, your brows change. At first, they look bold and may feel slightly swollen. Around day five, they flake and scab, looking patchy briefly.
Don’t pick at scabs, as this removes pigment and causes uneven color. Keep the area clean and apply the recommended ointment. Keep your brows dry for at least seven days. Avoid pools, saunas, and intense workouts.
Sun and certain skincare products cause early fading. Protect your brows with SPF and skip chemical exfoliants or retinoids on the area. With good care, results last 18 months to three years before needing a touch-up.
If you want more details, read: Brow Aftercare 101: How to Make Your Nano Brows Last Longer
Conclusion: Choosing the Right Professional Matters
The success of your permanent eyebrow makeup depends heavily on choosing a qualified, experienced technician. Look for exports who are certified, work in clean spaces, and have a portfolio showing natural-looking results. During your consultation, feel free to ask about their training, the pigment brands they use, and how they match colors to your skin.
At O’some Brows, we take time to understand what you want and work with you throughout the entire design process. We provide clear aftercare instructions and stay available to answer any questions during your healing period. Remember, this is an investment in how you look, so choosing quality over a cheap price will give you results you’ll love for years.
Click here to contact O’some Brows.
Frequently Asked Questions
Q1. How long does eyebrow micropigmentation last?
Results usually last 1 to 3 years. This depends on your skin type, lifestyle, and how you care for them. Oily skin fades faster. Dry skin keeps pigment longer.
Q2. Does the procedure hurt?
Most clients feel very little discomfort because numbing cream is used. It feels like eyebrow threading or plucking, not painful.
Q3. Can I still wear makeup after getting micropigmentation?
Yes. Once fully healed (around 4 weeks), you can wear brow makeup if you want. Most people find they don’t need it anymore.
Q4. What’s the difference between microblading and micropigmentation?
Microblading uses a hand-held blade to make strokes. Micropigmentation uses a digital machine. The machine gives more precise, even results that work well on all skin types.