Monthly Archives: January 2026

Are Nano Brows Safe for Sensitive Skin? Everything You Should Know

Summary

Nano brows are usually safe for sensitive skin if done by a professional. This technique uses very fine needles and causes less damage than microblading, which makes it good for sensitive skin. Here’s what you need to know about safety, risks, and what happens during the process.


If you have sensitive skin and want to wake up with perfect eyebrows every day, you’ve probably thought about nano brows treatments. Good thing: this modern eyebrow technique is actually one of the gentler options out there. But like any cosmetic procedure, there are things you need to know before booking.

Let’s cover everything about nano brows and sensitive skin, including how it works, possible risks, and how to get the best results.


What Makes Nano Brows Different?

Nano brows use a digital machine with ultra-fine needles to create hair-like strokes in your eyebrows. Unlike microblading, which uses manual blades to cut into the skin, nano brows deposit pigment more gently and precisely.

Think of it this way: microblading is like using a knife to make tiny cuts, while nano brows work more like a tattoo pen that taps pigment into your skin. The difference matters, especially if your skin gets irritated easily.

The precision of the machine means:

  • Less damage to your skin surface
  • Very little bleeding during the procedure
  • Faster healing time
  • Better results that last longer

This gentler approach makes nano brows a good choice for people who have sensitive skin that reacts to almost everything, and here is why it works.


Why Nano Brows Work Well for Sensitive Skin

Your skin type plays a huge role in how well any semi-permanent makeup method will work. If you have sensitive skin, you already know that many beauty treatments can leave you red, irritated, or uncomfortable.

So why are nano brows sensitive skin treatments becoming so popular?

Gentler on your skin

The machine works with precision and doesn’t damage your skin much. No blades are used. Just controlled needle taps that put color exactly where it should go.

Works for most skin types

Nano brows suit oily, dry, combination, mature, or sensitive skin. Regular microblading only works well on normal to dry skin.

Heals quickly

Most people heal completely in 7 to 14 days. The difficult part passes quickly because the procedure doesn’t cut deep into your skin.

Less chance of scars

Without any cutting, the risk of permanent scars is much lower. This is important if your skin scars easily.

Nano brows are also perfect for oily skin. Oily skin usually has problems with microblading because the color spreads and looks blurry over time.


What Can Go Wrong With Nano Brows?

All cosmetic methods come with some level of risk. Understanding what can go wrong with nano brows lets you decide better.

Let’s talk about potential problems.

Common Short-Term Issues

  • Redness and swelling: Your eyebrow area will look red and feel a bit swollen for the first few days. This is normal. But if the redness gets worse instead of better, contact your technician.
  • Itching: Your skin will itch as it heals, sometimes a lot. The main rule is don’t scratch. Touching or picking at your brows removes pigment and brings in bacteria.
  • Scabbing and flaking: Light scabs form as part of healing. They start flaking off around day 5 to 7. Let them fall off by themselves. Picking them removes pigment and can cause scars.
  • Uneven healing: One eyebrow might heal differently than the other. This is normal and usually evens out later. Touch-up sessions fix any unevenness.

Knowing these common things helps you stay calm while healing.


More Serious Complications

Infection: Infections are rare but can happen without proper hygiene. Watch for these warning signs:

  • Some area feels hot when touched
  • Redness that spreads and gets worse
  • Pus or fluid leaking from the spot
  • Bad swelling after the first few days
  • Fever or feeling sick

If you see any of these symptoms, get medical help right away.

Allergic reactions: Some people react to the pigment or numbing cream used during treatment. Reactions include rashes, hives, long-lasting itching, or burning feelings.

Pigment migration: Sometimes the ink spreads under your skin instead of staying put. This creates a blurry, muddy look instead of clean hair strokes. Migration happens more with oily or very thin skin, or when pigment goes too deep.

Color changes: Your brows might heal to a different color than you expected. They could turn warmer, cooler, or even orange or grey. This happens because everyone’s skin chemistry is different.

Good quality pigments and skilled technicians lower this risk a lot.


Understanding the Risks Better

Knowing what can go wrong with nano brows shouldn’t scare you. It should help you ask smart questions and pick the right professional.

Most problems happen because of poor hygiene, inexperienced technicians, cheap pigments, wrong aftercare, or working on people who aren’t good candidates.

When you handle these factors, your risk drops a lot.


Who Should Avoid Nano Brows?

Certain conditions make nano brows riskier or completely unsuitable. Being honest about your health helps protect you from any potential risk.

Skin Conditions That Need Extra Care

If you have eczema, psoriasis, rosacea, or dermatitis around your eyebrows, be careful. These conditions mean your skin is already reactive.

Don’t get nano brows during active flare-ups. Even if your condition is controlled, talk to your dermatologist and the nano brow artist before going ahead.

People who get keloid scars should also think twice. Any skin injury, including nano brows, might cause raised, thick scars.


Medical Conditions Requiring Doctor Approval

You’ll need medical clearance if you have:

  • Diabetes (heals more slowly and has a higher chance of infection)
  • Autoimmune disorders (healing problems)
  • Blood disorders or taking blood thinners
  • Heart conditions or having a pacemaker
  • Thyroid problems
  • Epilepsy

Never stop taking prescribed medication without talking to your doctor first.


Essential Aftercare for Sensitive Skin

After your procedure is done, how you care for your brows determines your results, especially with sensitive skin.

First 24 Hours

  • Don’t touch your brows
  • Keep them completely dry
  • Apply recommended healing balm 2 to 3 times
  • Sleep on your back if possible
  • Avoid makeup on the area

Days 1 to 7

  • Gently clean with fragrance-free soap starting day 2
  • Pat dry with clean tissue
  • Apply healing balm as told
  • Keep them dry in the shower
  • No swimming, sweating, or exercise
  • No makeup on your brows
  • Don’t pick at scabs

Days 7 to 14

  • Keep cleaning gently
  • Let the remaining flakes fall on their own
  • Protect from direct sun
  • Still avoid harsh face products
  • You can do light exercise again

Weeks 2 to 4

  • Go back to normal skincare routine (gently)
  • Use sunscreen when outside
  • Avoid exfoliating products near brows
  • Go to your touch-up appointment

The better you follow aftercare, the better your results.

Click here to read Brow Aftercare 101: How to Make Your Nano Brows Last Longer for more details on this

Note for web developer: please attach the link to the Brow Aftercare 101 after posting the blog.


Conclusion

Nano brows are a safe and effective choice for people with sensitive skin who want beautiful, natural eyebrows. The gentle machine method causes less skin damage while giving you precise, long-lasting results.

Knowing the possible problems with nano brows helps you make smart choices, find skilled professionals, and spot warning signs early. Like O’some Brows.

Three things lead to success: picking an experienced artist who knows sensitive skin, being honest about your health issues, and following aftercare steps exactly. When you get all three right, nano brows can change how you look and make your morning routine easier.

That’s why at O’some Brows, we connect you with the best artists for your sensitive skin. We care about your results and work hard to make sure you love your new eyebrows. Your eyebrows frame your face and deserve expert care that keeps your skin safe and healthy.

Click here to book your appointment with O’some Brows today and take the first step toward effortless beauty.


Frequently Asked Questions

Q1. How long do nano brows last on sensitive skin?
Nano brows last 12 to 36 months based on your skin type and care habits. Touch-ups every 12 to 18 months keep them looking fresh.

Q2. Is the nano brow procedure painful for sensitive skin?
Most people feel mild discomfort, not pain. Numbing cream is applied first, and nano brows feel gentle.

Q3. How do I know if my nano brows are infected?
Watch for spreading redness, hot skin, pus, swelling after day three, or fever. Contact your technician and see a doctor right away if these happen.

Q4. Can I wear makeup during the healing process?
Don’t put makeup on your brows for at least 10 days. You can use makeup elsewhere on your face.

Q5. Why do my nano brows look patchy during healing?
Patchy spots during days 5 to 10 are normal as scabs fall off. The touch-up session fixes any uneven areas.

Brow Aftercare 101: How to Make Your Nano Brows Last Longer

Summary

Want your nano brows to last longer? Find out the best ways to take care of them. You’ll learn the right cleaning methods, how long healing takes, and easy routines that protect your brows and keep them looking great for up to 3 years.


Nano Brows Aftercare: How to Make Them Last Longer

Nano brows are a great investment in how you look, but what you do after leaving the salon matters most. How you care for your brows in the first few weeks decides how long they stay beautiful and bright.

Your nano brows are like a fresh tattoo and need special care. Your skin just went through a detailed procedure, so now you need to help it heal the right way. Follow the correct steps and your brows can look great for up to three years instead of fading fast.


Understanding Your Nano Brows Investment

Before we talk about aftercare, you should know what nano brows are and how long do nano brows last with good care.

Nano brows are made with a super-fine needle on a digital machine. It makes tiny lines that look just like natural hair. This needle is softer on your skin than old techniques, so healing is quicker and results are nicer.

How long do nano brows last depends on person to person. Most people have great-looking brows for 18 months to 3 years. Things like your skin type, lifestyle, and care routine affect how long they stay.

Oily skin types see results for about 12 to 18 months. Your natural oils break down the pigment more quickly. People with dry or normal skin often get results that last the full 3 years.

Your lifestyle choices count too. Spending a lot of time in the sun, swimming often, or using strong facial products near your brows makes the color fade sooner.

After you get your brows done, the first 24 hours are the most important. This is when you need to be careful with how you treat them.


The First 24 Hours

The first day after your procedure is the most important time for setting up successful healing.

Your brows will look darker and bolder than you expected. This is completely normal and part of the process. The color will soften significantly as healing progresses, so don’t panic about how they look right now.

In the first 24 hours, avoid touching your eyebrows. Your hands have bacteria that can lead to infection. If you really need to touch them, wash your hands well with antibacterial soap first.

You might see a clear liquid coming from your brows. This is normal. Use a clean tissue to gently dab it away every few hours. Don’t let it dry on your brows because it will form thick scabs. When these scabs fall off, they can take the color with them.

Keep your brows totally dry on the first day. No washing, no water, no sweating. Try to sleep on your back that night so your brows don’t rub against your pillow.


Days 2

After the first day, start a gentle cleaning routine. This helps your brows heal properly while keeping them protected. Nano brows usually heal faster than microblading, but the microblading aftercare steps work well for them too.

Clean your brows twice a day, in the morning and at night. Wet a cotton swab with warm water and add a small drop of mild soap without fragrance. Gently pat your brows without rubbing. Rinse with a clean, damp cotton pad. Dry them completely with a clean paper towel.

After cleaning, apply a tiny amount of aftercare ointment (about the size of a rice grain). Your technician should have given you this. Spread it thinly over both brows. Keep the layer thin. Your brows should never look shiny or greasy.

During this week, avoid working out, sweating, swimming, long hot showers, and makeup near your brows. Sleep on your back, not your stomach or side.

Around day 3 or 4, your brows might feel itchy. This is normal and means they’re healing. Don’t scratch. If the itch gets bad, tap gently around the area or add a bit more ointment.


Day 5 and Beyond

Around day 5, small scabs will form on your brows. Some people get heavy scabs, others barely see any. Both are normal. It depends on how your body heals.

These scabs protect the pigment while new skin grows underneath. Your brows might look darker, patchy, or uneven right now. Don’t panic. This awkward phase is temporary and part of healing.

The most important rule is: don’t touch them. Never pick, peel, scratch, or remove the scabs. When you pull off a scab too early, you pull out the pigment with it.

Let the scabs fall off by themselves. Most will start flaking between days 7 and 10. Keep cleaning gently during this time, but be extra careful not to knock off the scabs while washing.

Your brows will look lighter and patchier as scabs fall off. This is normal. The pigment is still under your skin and will show up more as healing finishes.

After the scabs come off, your brows keep healing underneath for a few more weeks. You can ease up on the strict cleaning now, but stay gentle. Wash your face like normal, just use mild soap around your brows.

Your color will keep changing. Around week 2, your brows might look very light. This is the ghosting phase, and it’s completely normal. The color comes back as the pigment settles.

You can return to most activities, but avoid direct sun, rough scrubs near your brows, and strong products like retinol or vitamin C serums. Wait 10 to 14 days before wearing makeup. When removing it, use oil-free remover and be gentle.


Long-Term Care: How to Make Nano Brows Last Up to 3 Years

Once fully healed, good care makes your brows last much longer. Proper maintenance can give you 3 years instead of just 18 months.

The sun is your biggest problem. UV rays destroy the pigment just like they fade furniture. Put SPF 30 sunscreen on your brows every single morning, even when cloudy. Wear a hat or sunglasses outside. This one step can add 6 to 12 months to your results.

Your face products matter too. Some ingredients push out pigment faster by speeding up skin cell turnover. Keep retinol, glycolic acid, salicylic acid, scrubs, and peels away from your brows. Use them elsewhere on your face, just not near your eyebrows.

Choose gentle, fragrance-free cleansers and simple moisturizers for your brow area.


Touch-Up Schedule: Keeping Your Brows Perfect

Even with perfect care, your nano brows will slowly fade over time. This is normal, not a problem.

Your first touch-up comes 6 to 8 weeks after getting your brows done. This appointment matters a lot. During healing, some spots naturally lose more color than others. Your technician will fill in light areas and make everything look even.

After that first touch-up, you’ll need maintenance every 12 to 18 months. The exact timing depends on your skin type and how well you care for your brows.

You’re ready for a touch-up when the overall color looks much lighter, the strokes become less clear, or one brow fades more than the other.


Conclusion

Nano brows are an investment that needs commitment. The procedure creates beautiful brows, but your aftercare makes them last.

Care happens in three stages: intense healing during weeks 1 and 2, ongoing protection through week 6, and long-term maintenance after that.

Most important tips: keep brows clean and dry during healing, don’t pick at scabs, protect from the sun every day, skip harsh skincare products near brows, and get touch-ups every 12 to 18 months.

Good aftercare, mainly sun protection, keeps your brows looking great for up to 3 years.

Your beautiful brows are within reach. You now know exactly how to maintain them for years ahead.

Want to see if nano brows are right for you? Book a consultation with us. We’ll look at your natural brows, talk about what you’re hoping for, and make sure you have all the info you need before deciding.

Click here to book an appointment.


Frequently Asked Questions

Q1. How long do nano brows take to fully heal?

Your brows heal on the surface in 7 to 10 days, but full healing takes 4 to 6 weeks. You’ll see the final color around week 6.

Q2. Why do my brows look so dark right after the procedure?

Fresh pigment looks very dark at first. As your skin heals and flakes off, the color gets softer by week 4.

Q3. What happens if I accidentally get my brows wet?

If water touches your brows in the first week, pat them dry right away. One quick splash won’t ruin them, but getting them wet often can make them fade early.

Q4. Can I exercise after getting nano brows?

Don’t exercise for at least 7 to 10 days. Sweat brings bacteria and fades the color.

Q5. Will my nano brows fade completely over time?

Nano brows fade slowly over 18 months to 3 years. This lets you update your brow style as trends change.


Cost vs. Confidence: Understanding Permanent Eyebrow Tattoo Price

Let’s face it, your eyebrows have the power to frame your entire face. When they’re shaped well, everything just looks more polished. But what if you could have that perfectly filled-in, symmetrical brow all the time, without pencils or powders? That’s the beauty of permanent eyebrow tattoos.

Still, one question always comes up before booking: how much does it cost? And more importantly, is it worth it? If you’ve been researching the permanent eyebrow tattoo price, this blog will help break it all down in a way that actually makes sense.


First, What Is a Permanent Eyebrow Tattoo?

Despite the name, it’s not the same as a traditional tattoo. Permanent brows are also called cosmetic tattooing or semi-permanent makeup. They are done using special pigments and techniques designed for facial skin.

The result is natural-looking, hair-like strokes (think microblading or nano brows) or a powdery, filled-in effect.

These treatments are designed to fade gradually over time, giving you a long-lasting but not forever result. Most last between 12 and 24 months, depending on your skin type, lifestyle, and aftercare.


So, What Affects the Price?

When you do a search for permanent eyebrow tattoo price, you will see numbers all over the map. Some salons are charging $300, others are charging $1000 and up. So why is there such a big range? Let’s look at what impacts price:


Experience of the Artist

This is a big one. Artists have been doing this for years, they have a portfolio, and they constantly produce consistent results at high quality and tend to charge more and understandably so. You are paying for skill, not guesswork.


Geographic Location

Price will vary according to your city. In larger metropolitan areas like Atlanta, LA, or New York, rent and demand pushes the price up. You may find a smaller town cheaper, however, the greatest consideration should be quality rather than a zip code.


Technique Used

Microblading, powder brows, ombré brows, nano strokes – each technique has a set of tools, tools, time and skill level. Some even combine techniques for a tailored outcome. More advanced methods will generally cost more.


Are Touch-Ups Included?

Most brow tattoos require a follow-up appt (usually between 6–8 weeks) to refine the shape and colour. Some Artists will include this in their pricing, while some will charge for it separately. Always ask what is included prior to booking.


Online Reputation & Results

If an artist has a track record of five-star reviews, glowing testimonials, and fully healed before-and-afters, you’re paying for a service and peace of mind.


Is It Worth the Cost?

If you are someone who fills in your brows daily, spends money on pencils, gels, tints, and still feels like something’s off, then yes, the investment can absolutely be worth it.

Here’s what you’re really paying for:

  • Time saved every morning

  • Consistent shape and colour without the daily effort

  • Long-term savings on brow products

  • Boost in confidence that lasts for months on end

  • Professional precision you just can’t get with DIY methods

And let’s be honest: when your brows look good, everything else kind of falls into place.


Things to Watch Out For

If a price seems too good to be true, it probably is. Avoid artists who:

  • Don’t show healed results

  • Can’t explain the aftercare process

  • Rush through consultations

  • Skip patch testing

  • Don’t have proper certification or training

It’s better to wait and save up for quality than end up needing correction work, which will cost you even more in the long run.


Final Thoughts

When evaluating the price of the permanent eyebrow tattoo, think beyond the price and assess the value. A well-tattooed eyebrow will not only enhance your overall look, but will improve your quality of life, instills confidence in you and will save you time and money in the long run.

You are not paying for pigment, you are paying for how you feel every time you look in the mirror.

At O’Some Brows, we train our artists in the latest procedures for you to have the brows that best fit your face, lifestyle, and vibe, no cookie-cutter brows. We have the cleanest studio, the best pigments, and the best reputation for delivering results. Your brow tattooing process is in good hands.

Nano Brows vs Microblading: Which Brow Technique Gives More Natural Results?

Choosing between nano brows and microblading depends on your skin type and your desire. Nano brows use a digital machine for softer, precise strokes, while microblading creates bold, defined lines with a manual tool.


Nano Brows vs Microblading: Which One Is Right for You?

Are you tired of drawing your eyebrows every single morning? Do you want to wake up with perfect brows already done? Many people feel the same way. That’s why thousands of women are now getting semi-permanent brow treatments. It saves time and makes them feel more confident.

If you want semi-permanent brows, you have two popular choices to choose from: nano brows vs microblading. Both give you fuller, natural-looking eyebrows, but they use different methods. Knowing how they’re different will help you pick the right one for your face and lifestyle.

Let’s explore everything you need to know about these techniques.


What Are Nano Brows?

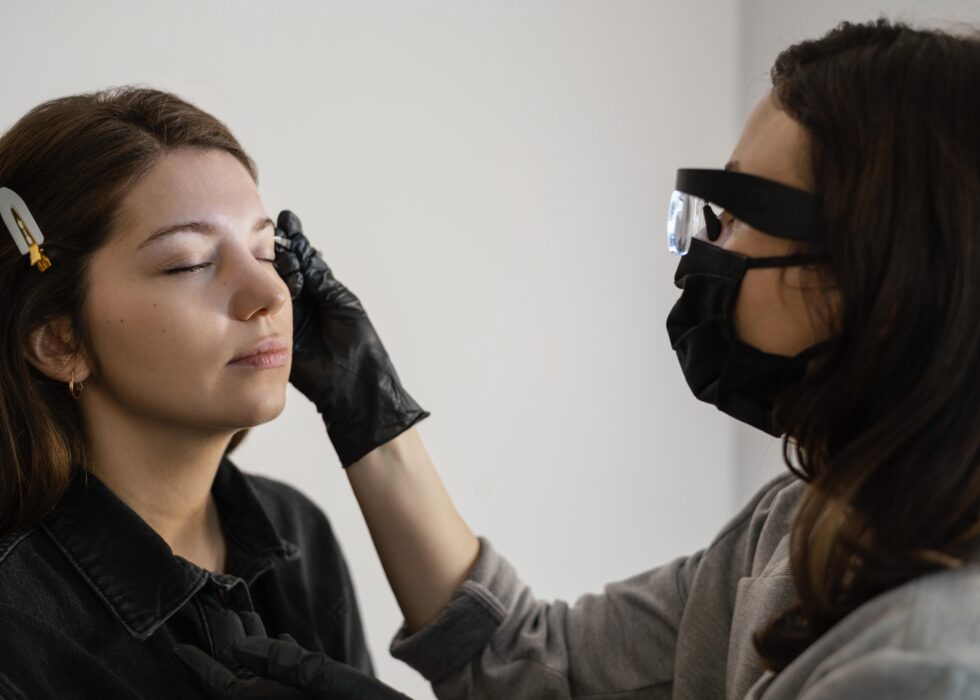
Nano brows use a digital machine with an ultra-fine needle to create hair-like strokes. Think of it as a precision tattoo machine designed specifically for eyebrows.

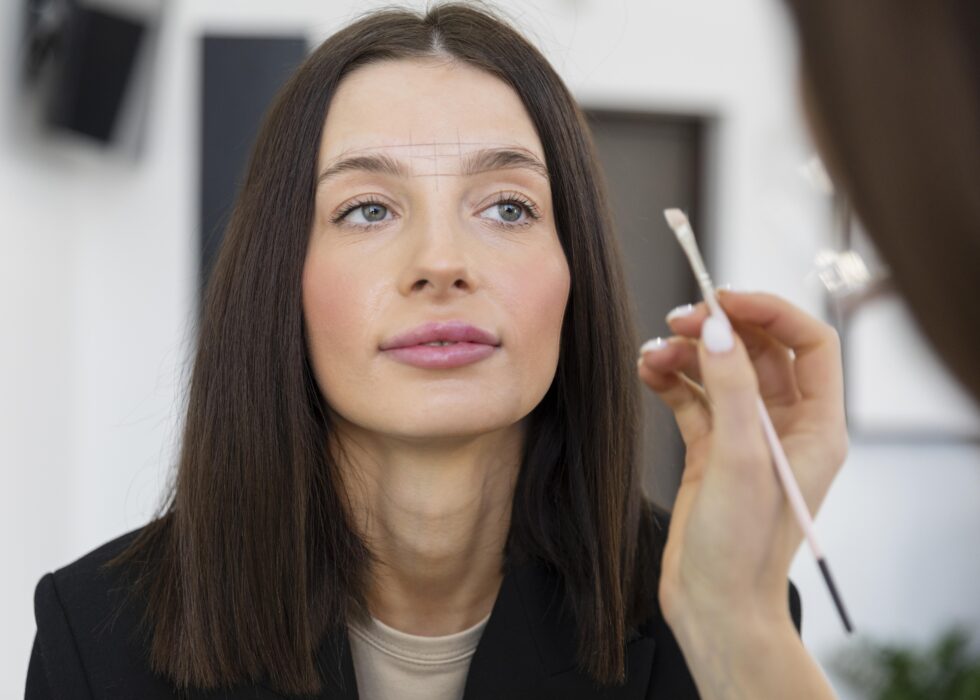
The technique works by putting tiny dots of color into your skin. It creates strokes that get thinner at the ends, just like real hair. Artists can layer these strokes and cross them over each other to make them look realistic. The needle only goes 0.4 to 0.5mm deep into your skin.

This method gives you soft, feathery brows that blend right in with your own hair. They look really natural because the strokes aren’t all the same. Some are thicker, some are thinner, and the color varies too.

The process takes about two hours from start to finish.


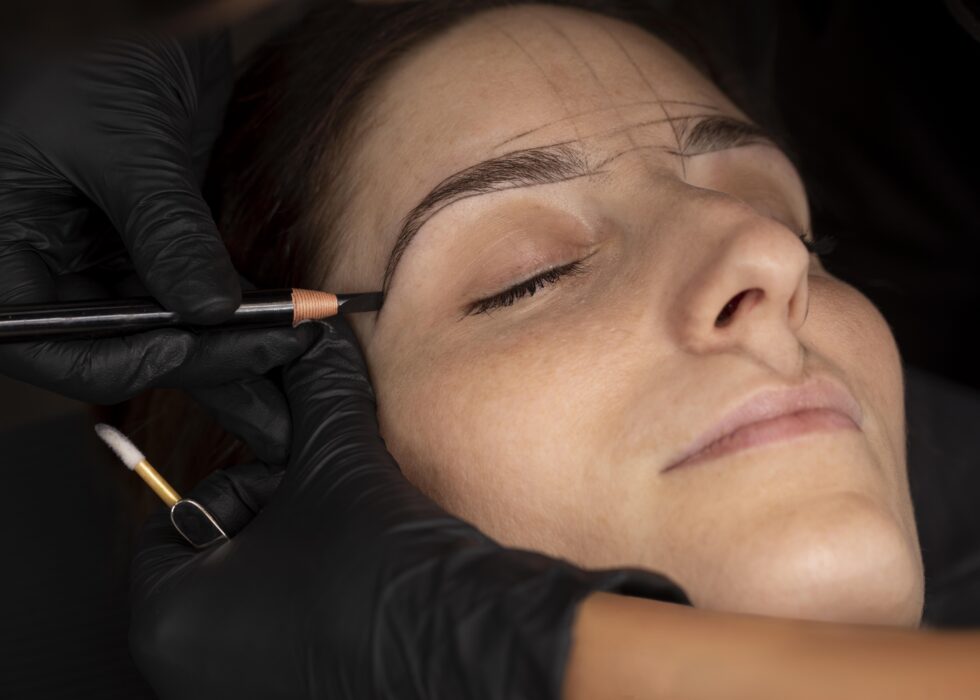
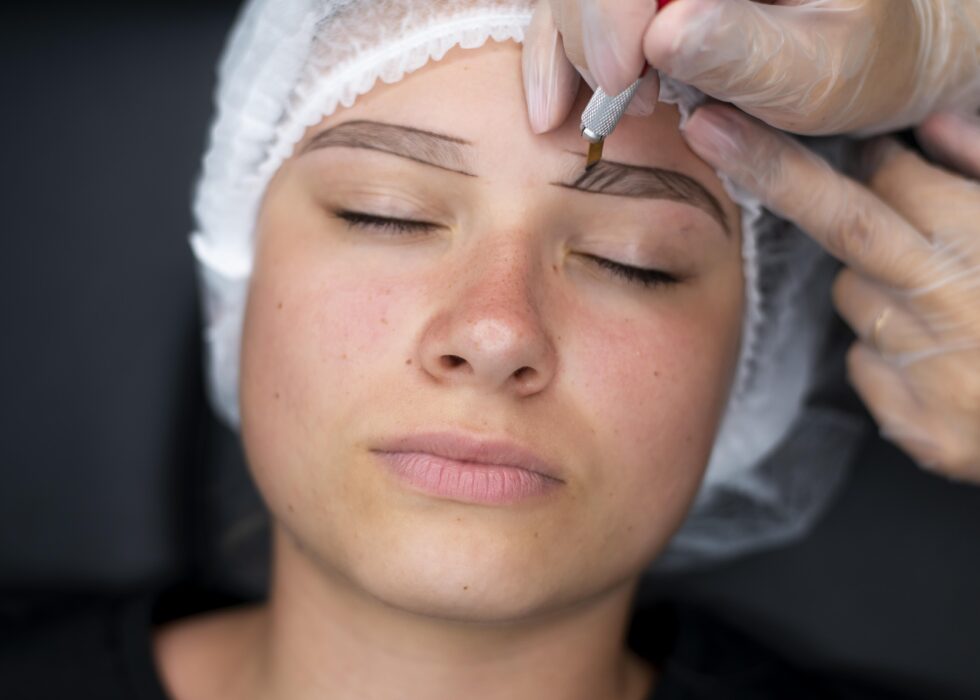
Understanding Microblading

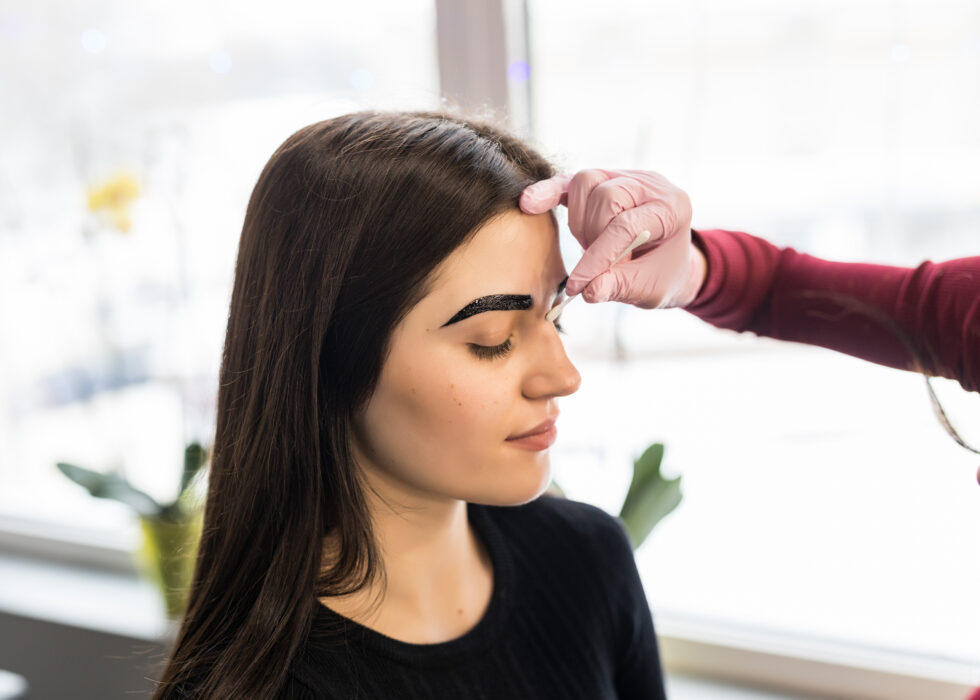
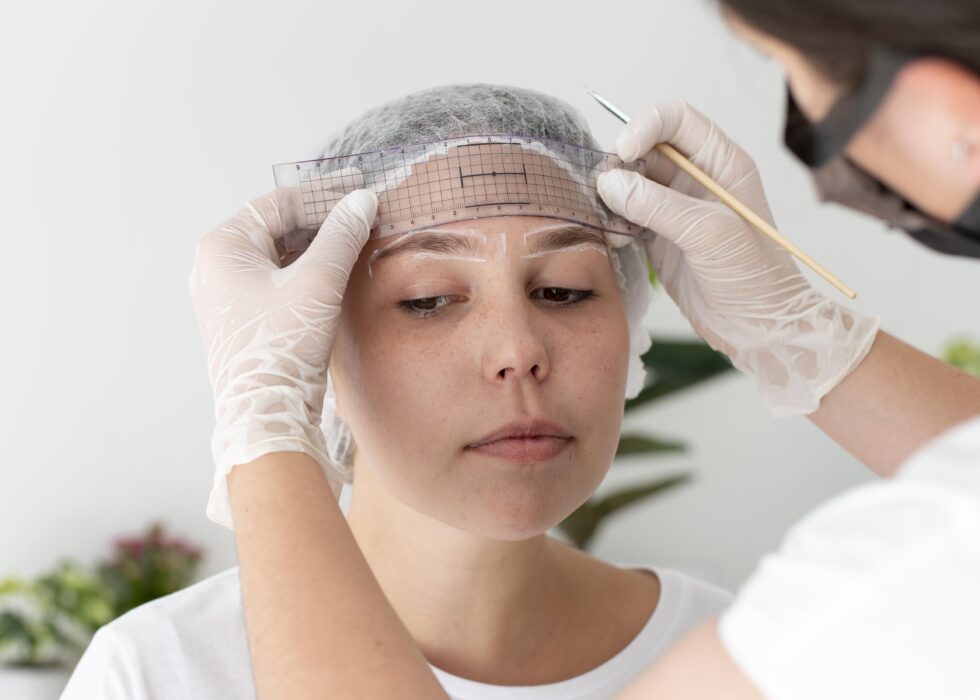
Microblading is a manual technique that’s been popular since the early 2010s. A trained artist uses a tool with tiny needles arranged like a blade to create individual hair strokes.

The full process. The artist first dips a small blade in pigment. Then they make tiny cuts in your skin at a 45-degree angle. Each cut looks like real eyebrow hair. The pigment fills these cuts and stays there.

Microblading creates crisp, defined strokes that look like individual hairs. The results are structured and polished, perfect if you want clearly visible, well-shaped brows.

Now that we know both techniques, let’s find which one is best for you.


Nano Brows vs Microblading

When choosing between nano brows vs microblading, think about a few things. Consider your skin type, how much pain you can handle, and what kind of look you’re going for.


Technique and Tools

The main difference is how each one is done.

Microblading uses a manual, handheld blade with 7–14 tiny needles. The artist controls everything by hand, which requires significant skill and a steady hand. This creates deeper cuts in your skin.

Nano brows use a digital machine with a single fine needle. The machine controls the depth and pressure consistently, causing less pain to your skin. This precision leads to better results, especially for tricky areas.


Appearance and Final Results

Both techniques can look natural, but they create different styles.

Microblading gives you:

  • Sharp, defined strokes

  • Clear individual hair lines

  • Polished look

  • Bold, noticeable brows

On the other hand, Nano brows give:

  • Soft, feathered strokes

  • Different stroke widths

  • A light, natural enhancement

  • Wispy, natural-looking brows

If you ask, “Which is more natural, microblading or Nano brows?” the answer depends on your definition of natural. Nano brows typically appear softer and more realistic up close because the strokes blend better with existing hair.


How Long Do Nano Brows Last?

One common question is “How long do nano brows last?” The answer depends, but here are general expectations:

  • Nano brows last: 18 to 36 months on average

  • Microblading usually lasts 12 to 18 months before touch-ups

So, the answer to “which lasts longer, nano brows or microblading?” is that nano brows generally win. The machine method deposits pigment more evenly, which helps it last longer.

Several factors also affect how long your results last, regardless of technique.

You might be interested in trying them, but you want to know about the pain first. Here’s the answer.


Pain Levels: Which Hurts Less?

Pain is a top concern for most people considering these procedures.

Nano brows are significantly less painful. The digital machine’s gentle vibration and light tapping motion cause minimal discomfort. Most clients rate it 1–2 out of 10 on a pain scale.

Microblading can feel like mild scratching or pinching. Most clients rate it 2–3 out of 10. The manual cutting motion creates more sensation than the machine method.

Both treatments use numbing cream that goes on 20 to 25 minutes before they start. When the numbing works well, most people say it feels like pressure or mild discomfort. They don’t really call it painful.

Everyone handles pain differently, but nano brows are generally more comfortable.


What Is Nanoblading?

You might hear the term “nanoblading” and wonder what it is exactly. This causes confusion because different people use the term differently.

Nanoblading usually means microblading done with very small needles. The method stays the same. It’s still done by hand with a blade. The only difference is that the needles are smaller and finer.

But some people use the word “nanoblading” when they actually mean nano brows. These two things are different, though.

  • Nanoblading = manual blade work with tiny needles

  • Nano brows = machine work with a single needle

Both create fine strokes, but the application method differs. Always clarify with your artist which technique they’re actually offering.

But now you know the real difference.


Making Your Decision

Now that you know about both options, which one should you pick?

Go with nano brows if you have oily, sensitive, or aging skin. Choose it if you want soft, natural-looking brows. They’re less invasive and last longer.

Go with microblading if you have normal or dry skin. Choose it if you want clear, structured brows with visible strokes. It costs less at first and takes less time. Plus, it’s been around longer and proven to work well.

There’s no wrong choice here. Both methods can give you gorgeous brows when done right. You’ll feel more confident and save time every morning.


Conclusion

Choosing between nano brows vs microblading ultimately comes down to your individual needs. Both techniques offer beautiful, natural-looking results that can transform your daily routine.

Nano brows provide softer, more feathered strokes with longer-lasting results and work better for oily or sensitive skin. The nano brow technique uses a digital machine for precision and comfort.

Microblading delivers defined, structured brows with crisp strokes and a more affordable entry point. It’s proven and widely available.

At the end of the day, the artist you choose is more important than the method itself. You want someone who really knows what they’re doing. That’s what O’some Brows is all about.

We have years of experience with both nano brows and microblading. We make sure that you’re completely happy with how your brows look.

Ready to have beautiful brows? Click here to book an appointment with us today.


Frequently Asked Questions

Q1. Can I switch from microblading to nano brows later?

Yes, you can switch. Just wait until your microblading fades completely, which takes 18 to 24 months. Some leftover pigment might affect your new color, so talk to your artist about it.

Q2. Will my brows look fake immediately after the procedure?

Yes, both look darker right after the procedure. This is normal. They’ll lighten by 30 to 40% as they heal and reach their final natural look.

Q3. Are there any age restrictions for these procedures?

Most artists require you to be at least 18 years old. Some want clients to be 21 or older. There’s usually no upper age limit, but older skin needs special care.

Q4. Can I exercise after getting nano brows or microblading?

Don’t exercise, swim, use saunas, or sweat heavily for at least 10 days after. Sweat can push out the pigment and cause infection. Light walking is okay, but wait to do hard workouts.

Q5. Do these procedures work on all brow colors and hair types?

Yes, both work for all hair colors and types. Your artist will mix pigments to match your hair and skin tone. Very light blonde or gray hair might need special pigment blends.

What to Expect During Your First Semi-Permanent Brow Appointment

Summary

Interested in semi-permanent brows? Here’s what your first appointment involves, plus preparation tips and healing stages. Learn if microblading is worth it for gorgeous, natural eyebrows.


What to Expect at Your First Semi-Permanent Brow Appointment

Your first semi-permanent brow appointment might make you feel nervous. You probably have lots of questions. What happens during the appointment? Does this hurt? How long does it take? What do you need to do before and after?

We’ll explain everything you need to know in this blog before your visit.


Understanding Semi-Permanent Brows

Before we dive into what happens during your appointment, let’s quickly cover what semi-permanent brows actually are.

Semi-permanent brows (or microblading) add pigment to the top layer of your skin. This creates natural-looking hair strokes. Unlike regular tattoos that last forever, these brows fade slowly over time.

In the end, you’ll have Fuller, perfectly shaped eyebrows that look completely natural. No more daily brown makeup routines.

Now that you know the basics, let’s talk about what your first appointment will look like.


How Long Does a Microblading Appointment Take?

One of the most common questions people ask is: how long does a microblading appointment take?

It depends, but most probably, it will be about 2.5 to 3 hours for your first session. This might sound like a long time, but each step is important for achieving the best results.

Here’s how the time will more likely go:

  • Consultation and brow mapping: 20 to 30 minutes

  • Numbing cream application: 30 to 45 minutes

  • The actual microblading procedure: 1 to 2 hours

Your technician takes their time with each step. They make sure your brows look right, and you feel comfortable the whole way through.

Don’t forget, you’ll need a second appointment 4 to 6 weeks later for touch-ups. This visit is quicker and usually comes with your package.

Knowing how long it takes helps you plan your day better, so you’re not stressed or in a hurry.


How To Prepare for Semi-Permanent Eyebrows?

Proper preparation makes a huge difference in your final results. Here are the most important things to do before your appointment:

What to Avoid:

  • Stop taking aspirin or ibuprofen 48 hours before. They cause bleeding that stops the pigment from setting properly.

  • Don’t drink alcohol or caffeine for 48 hours before. They thin your blood, and the pigment won’t stay as well.

  • Skip workouts 24 hours before your appointment. Sweat opens your pores and messes with the procedure.

  • Don’t wax, thread, or tint your brows for 7 to 10 days before. Your artist needs to see your natural hair to shape it right.

  • Avoid sun and tanning for one week. Sunburned skin won’t heal well.

What to Do:

  • Sleep well the night before. Rested skin heals faster.

  • Wear your normal brow makeup so your artist sees what you like.

  • Bring photos of brow styles you want.

  • Come on time, or a bit early, so you feel calm and ready.

These steps prepare your skin for the best results and make the pigment last longer.


What Happens During Your First Appointment

Here’s what to expect at your first brow session.


Step 1: Consultation and Design

Your appointment begins with a chat. Your technician asks about your brown goals, daily life, and any worries. They’ll check your medical history to make sure this treatment is safe for you.

Then comes brow mapping. Your technician measures your face and draws the perfect brow shape with a special pencil. They look at your face structure and natural brows to create a flattering design.

You’ll get time to check the mirror and request changes. Speak up if something feels off. These are your brows, so you should love how they look.


Step 2: Numbing

After you approve the design, your technician puts numbing cream on your brows. It takes 30 to 45 minutes to work.

While you wait, you can talk about colors or just relax. The cream makes sure you don’t feel much pain during the procedure.


Step 3: The Microblading Process

Once you’re numb, the main work starts. Your technician uses a small tool with tiny needles to create hair-like strokes. They follow the design you agreed on and work carefully.

Most people say it feels like light scratching, not real pain. Some spots, like the outer brow, might feel more sensitive, but the numbing cream helps.

Your technician picks a pigment color that matches your skin and hair. They add the color in layers to make it look even and natural.

The whole process takes 1 to 2 hours, depending on how detailed your brows are.


Step 4: Aftercare Instructions

Once the procedure is finished, your technician will give you detailed aftercare instructions. Following these instructions is absolutely critical for achieving beautiful, long-lasting results.

You’ll also receive a healing ointment to apply during the first week. Your technician will explain exactly how and when to use it.

Before you leave, you’ll schedule your mandatory touch-up appointment for 4 to 6 weeks later.


Critical Aftercare: The Rules You Must Follow

Your aftercare decides how good your brows look. Here’s what to do:

First 10 Days:

  • Keep brows completely dry. No water, sweat, steam, or swimming.

  • Put a thin layer of healing ointment on 1 to 2 times daily with clean hands.

  • Don’t use makeup on or around your brows.

  • Stay away from the sun and tanning beds.

  • No gym or sweaty activities.

  • Use a clean pillowcase and avoid sleeping on your face.

After 10 Days:

  • You can wash your face normally, but be gentle on your brows.

  • Keep using sunscreen to stop the color from fading.

  • Avoid strong skincare products near your brows for a few weeks.

These rules seem tough, but they matter. Good aftercare means beautiful brows instead of bad results.


Are Semi-Permanent Brows Worth It?

So after learning all this, you might wonder: are semi-permanent brows actually worth the effort?

The big question: are semi-permanent brows worth it?

The answer depends on your priorities and lifestyle.

Semi-permanent brows are worth it if you have sparse, thin, or uneven natural eyebrows. They’re great if you spend a lot of time every morning filling in your brows. If you want to wake up looking polished without makeup, this helps. They work well for active lifestyles where makeup doesn’t stay on.

You need to be willing to commit to regular touch-ups and have a budget for the initial work and maintenance.

They might not be worth it if you like changing your brow style often, as this isn’t ideal. People with extremely oily skin see pigment fade faster. If you’re not comfortable with a 1 to 3 year commitment, think twice.

For many people, the time saved and confidence boost make semi-permanent brows absolutely worth the investment.

No more worrying about smudged makeup or uneven brows. Just wake up, and you’re ready to go.


Conclusion

Getting your first semi-permanent brow appointment is an exciting step toward effortless beauty. Now you know what to expect from start to finish.

Remember the key points. Your first appointment takes 2.5 to 3 hours. Avoid blood thinners and alcohol beforehand. The healing has several stages, and the “ghosting phase” is normal. Follow strict aftercare for 10 days. You’ll need a touch-up after 4 to 6 weeks. Maintenance every 12 to 18 months keeps brows fresh.

Choose an experienced technician, follow all instructions, and you’ll get beautiful, natural brows that boost your confidence and save time daily.

Finding an experienced technician can be tough. That’s where O’some Brows comes in. We have years of experience in semi-permanent brows, and we make sure you leave with brows you absolutely love.

Click here to book your appointment.


Frequently Asked Questions

Q1. Does microblading hurt?

Most people feel very little pain because of the numbing cream. You might feel light scratching, but it’s easy to handle. If you can do eyebrow threading, microblading is no problem.

Q2. How long do semi-permanent brows last?

Semi-permanent brows last 12 to 18 months before needing a refresh. With good care and regular touch-ups, they stay beautiful for years.

Q3. What if I don’t like the shape or color?

This is why consultation and brow mapping matter. You approve the design before any work starts. If you’re unhappy after healing, you can get touch-ups, color adjustments, or removal.

Q4. Is microblading safe?

Microblading is very safe when done by a licensed technician using sterile tools and quality pigments. Always check their work and reviews first.

Q5. Will my natural brown hair still grow?

Yes. Microblading doesn’t hurt your hair follicles. Your natural brows keep growing normally, and you can still pluck strays.

How to Offer Brow and Lash Tinting in Your Salon

Adding new services to your beauty salon are not just about following trends, it is also about giving your clients more of what they already love. When it comes to quick and low-maintenance beauty treatments that make a difference, lash and brow tinting is at the top of the list.

It does not matter whether you are a full service studio, or you are starting with just brow work, tinting can help give your bookings a boost, create loyalty and bring clients back for more.

Let’s take a look at what lash and brow tinting really entails, how can you add it to your service list and of course, things every client really wants to know, such as how much is eyelash tinting and is it worth it?


What Is Lash and Brow Tinting, Exactly?

In simple terms, it’s a semi-permanent dye treatment for your eyelashes and eyebrows. It darkens and defines the hair which makes the lashes appear fuller and gives the brows a more structured look without any make-up. The results are subtle but impactful and last roughly 4–6 weeks.

For many clients, especially those with lighter hair or sparse brows, it’s a complete game changer. No more mascara smudges, no more brow pencils—just naturally defined features that last.


Why Add It to Your Service Menu?

Tinting lashes and brows in your salon provides a compelling case for a few reasons:

  • It’s quick. Generally, the lash and brow treatment takes between 15 and 30 minutes.

  • It’s inexpensive. Clients appreciate noticeable results without a lot of expense.

  • It can be bundled with additional services. Tinting can be combined with a brow wax, a lash lift and/or facial to bundle into a mini-makeover.

  • It builds trust. Clients who come in for regular tinting often will book recurring appointments with you and subsequently try some of your more advanced services.

It is also an easy introduction for people who might be intimidated by salon treatments. Someone who may not be quite ready for microblading or lash extensions, may be more inclined to try tinting.


How to Offer Lash and Brow Tinting the Right Way

If you are thinking about introducing tinting services, here’s what you will need to cover:


Get Properly Trained

Even though tinting might seem straightforward, you are working near the eyes, so precision and safety are key. Make sure you (and your team) are trained on:

  • Patch testing procedures

  • Tint selection based on skin tone and hair color

  • Safe application and removal techniques

  • Hygiene and eye protection protocols

Clients will trust you more when they know you’re not cutting corners.


Use High-Quality Products

Invest in professional-grade tinting formulas. They last longer, are less likely to irritate, and come in a wider range of shades. Some brands even offer plant-based or gentle formulas for sensitive skin.

Also, keep your setup clean and professional. That small detail goes a long way in reassuring new clients.


Educate Your Clients

Do not just apply and send them on their way. Talk them through aftercare (no water or oil-based products for 24 hours), how long the tint lasts, and what to expect as it fades. The more they know, the more likely they are to come back regularly.

Also, make sure you’re answering the questions they’re probably Googling.


How Much Is Eyelash Tinting?

That depends on your location and salon setup, but most salons charge anywhere between $20 and $40 for eyelash tinting alone. When paired with brow tinting or a lash lift, many offer package deals around $50–$80.

Clients want value, and bundling services (like lash tint + brow wax) is a smart way to encourage higher bookings.


Tips for Marketing Your New Service

Once you’re ready to launch, start spreading the word:

  • Post before-and-after photos (clients love seeing real results)

  • Offer a limited-time discount to first-time tinting clients

  • Run bundle promotions (eg, “Lash Lift + Tint at a special price this month”)

  • Add a detailed service page to your website with FAQs and pricing

Word-of-mouth is powerful here. When clients start getting compliments on their brows and lashes, you’ll be the first name they recommend.


Final Thoughts

Lash and brow tinting might seem like a small add-on, but do not underestimate the impact. For clients, it means waking up looking more polished without effort. For you, it means more bookings, better client retention, and a chance to upsell other services.

It’s affordable. It’s quick. And it delivers real results.

Join a professional training course at O’Some Brows Academy and learn how to offer tinting the right way safely, skillfully, and confidently. With hands-on guidance, live practice, and expert tips, you’ll be ready to add this high-demand service to your salon in no time.